HomeMixed Media ArtCrafts ProjectsTips, Tricks, TutorialsScrapbooking & Project LifeCooking, Baking, RecipesHome & DIY


Monday, March 3, 2014

The Big 20/20 Event: Day 3: A Heartfelt Love Card Tutorial

Welcome back to “The Big 20/20 Event” - I am so glad you’re joining us! We will be sharing 20 fantastic tutorials from a host of awesome contributors, for 20 days.
If you enjoy the tutorials, make sure you sign up for my newsletter, as all my newsletter subscribers will receive a beautiful PDF eBook at the end of the event, showcasing all 20 tutorial projects to keep and peruse at their leisure!
Here we go with our Day 4 tutorial.
~*~*~*~*~*~*~*~*~*~*~*~*~*~*~

The Big 20/20 Event: Day 3: A Heartfelt Love Card Tutorial


This post is brought to you by the lovely Linda.
Supplies and materials:
Paper card and envelope (I use the ready made card and then add paper, stamps and other items)
Stamps
Colored Paper
Markers, Crayons, Pencils (to color in the stamps) 

Letters to spell the word LOVE - I might use these to make glass tile necklaces, they're printed on photo paper.


Adhesive to glue the paper and other items down onto the card. You can use tape, glue, zots or any other product you prefer.

Step 1 - Layout your items as a sample.
I know I want to use the letters, so I cut them out first using a paper cutter with a straight edge.
Step 2 - I know I want to use red for Valentine's Day, so I cut a piece of red paper as a background for the letter and cut out a heart.

Step 3 - Place your content on the (white) card to see how it look. The red background is too big for the card. 
Step 4 - Still playing with the layout, I placed a stamp in the lower right corner to see how it would look. (We have 4 cats, so you can say we're cat lovers. John spoils them more than I do.)
Step 6 - Layout - I was going to use the heart stamp, but decided it's too flowery for my husband, so it doesn't get used.
Step 7 - I glued the letters to the red background and cut it to fit the letters.
Step 8 - The letters are glued on the red background onto the card. The red heart is also glued to the card. Now I want to add the cat stamp and ink it with purple.


Step 9 - I decide to add a stamp to the inside too. The second images shows what it looks like.

The card is finished, but I don't seem to have a picture of the completed front, but you get the idea.
Step 10 - Clean up - clean the stamps with a stamp scrubber. I use water and a little hand soap to wash off the stamps. 


Voila! - A handmade Valentine's Day card - Cover (almost complete)
Inside bottom - where the signature goes.


~*~*~*~*~*~*~*~*~*~*~*~*~*~*~


A Little More About Linda:
My Inspiration: I am inspired to create women's handmade kippot (headcoverings) and Judaica jewelry because it's fun to celebrate holidays and special events (like bar/bat mitzvahs).  I believe every girl or woman should have a handmade memento of the occasion so that every time it's worn, she'll remember the event again.
Gemstone shapes and colors also inspire me to make combinations that are unique. I also consider the gemstone characteristics to help people attain positive attributes. And, who doesn't love the sparkle and light of Swarovski crystals?
My Creating Style: Mostly, I am a self-taught jewelry designer and I started creating jewelry in 2008. I joined Etsy, but didn't list anything for a few months. I began with pretty simple jewelry and then decided to focus more on a Jewish niche. After taking a few classes in wire wrapping, I really fell in love with wire and beads.
My Biggest dream: I'd like my jewelry and kippah designs to be a household name, that people love LinorStore Jewelry and Kippot by Linda B and can purchase items in retail shops and on my website. I see happening after I retire.


You can find the lovely Linda in the following places:
My About Page on my Website
Sign up for my newsletter and get a free jewelry cleaning report

Pin It

Sunday, March 2, 2014

The Big 20/20 Event: Day 2: How To Plan A Non-Fiction Book

Welcome back to “The Big 20/20 Event” - I am so glad you’re joining us! We will be sharing 20 fantastic tutorials from a host of awesome contributors, for 20 days.
If you enjoy the tutorials, make sure you sign up for my newsletter, as all my newsletter subscribers will receive a beautiful PDF eBook at the end of the event, showcasing all 20 tutorial projects to keep and peruse at their leisure!!
~*~*~*~*~*~*~*~*~*~*~*~*~*~*~
 

The Big 20/20 Event: Day 2: How To Plan A Non-Fiction Book

 
Write your own non-fiction book
 
This tutorial is brought to you by the lovely Llinos.
A non fiction book can be a fabulous way of marketing your business or blog, and I'm here to remove the fear factor from it.  Last year I planned and wrote my first book, a true story of my time as a cancer patient, which is being released in 2014. 
A book of this type has infinite possibilities for you.  You can use it as a giveaway on your website, to gain bookings as a speaker, or of course to build your profile as a writer.
So here's my guide to getting your book all planned out and ready to write...
1. First of all, you need to decide on a topic.  Are you going to write about an experience from your own life?  Or is the book going to be about the story of your business success? (See the above picture for my ideas!)

fears
 
2. Once you have decided, you probably have concerns about getting the project done.  Don't worry, it's completely natural.  Write down a list of your worries.  Then scribble them out and write the complete opposite.  Don't let fear hold you back!

affirmations
 
3. Get a pad of post its and write an affirmation on each piece of paper, in order to inspire you to complete the book.  Write about how you want to feel as you write the book, and how you will be elated when you complete the project.

brainstorm
 
4. On a sheet of A4 paper, design a mind map of the book's outline.  Don't overthink it, go with what feels natural for every chapter.  Having a bubble for every chapter would be a good start.  Enjoy using different pens and colours!

your map
 
5. When you're happy with your chapter headings and can stick the map on the wall where you can see it, you can mind map each chapter with the important points to include in every one.  Remember you don't have to find all content from scratch; you can use your blog posts, or journal entries.  Look through your work or browse photos for inspiration and guidance on what to include in the book. 
You now have a clear map of your book.  Get to it and write!

And here's a little more about the lovely Llinos:
What inspires you?
I get lots of inspiration from nature, books and animals.  I'm lucky to have a vivid imagination and a  deep love of life.
Where do you get ideas?
I browse blogs and Etsy.  I doodle and see where the journey takes me.  I always have a stock of pretty paper or paints to get ideas flowing.
How long have you been creating products?
I first got in touch with my creative nature and began making candles about 5 years ago.  Then I drifted away from it, and in 2012 developed a love of making art and cards.  All my life I have written stories and articles. 
What is your biggest dream for the future?
My big, beautiful dream is to set up my own successful Etsy shop and inspire women with my card designs and affirmations.  I also want to raise oodles of money for charity and write lots of books, fiction and non fiction, and release them into the world for the women who need them most.

Llinos
 
 
Llinos is a writer, speaker, fundraiser and creative soul who lives in Cardiff, UK.  Find her at Inspiration After Illness or on Twitter @afterillness

Pin It

Saturday, March 1, 2014

The Big 20/20 Event: Day 1: Make Your Own Honeyed Mead

Today we’re kicking off “The Big 20/20 Event! I’m so happy you are joining us!
Over the next 20 days, we will be sharing 20 fantastic tutorials from a host of awesome contributors.
If you enjoy the tutorials, make sure you sign up for my newsletter, as all my newsletter subscribers will receive a beautiful PDF eBook at the end of the event, showcasing all 20 tutorial projects to keep and peruse at their leisure!!
~*~*~*~*~*~*~*~*~*~*~*~*~*~*~
But now, without further ado, our first contribution to the event:
 

Make Your Own Honeyed Mead


Hello there lovelies! I hope you are well, wherever in the world you are joining us from and WELCOME TO OUR BIG 20/20 EVENT!
I am so looking forward to sharing with you a whole series of 20 tutorials from a whole team of talented creatives, including myself.
As the organizer of the event, I thought it only fair that I kick things off with my own tutorial. It is a recipe I based on one in the above spell book and was something that was completely new to me.
 
Let's make some Honeyed Mead together. The perfect drink to accompany Game Of Thrones :)
Here's the how-to:
 
 
You will need: honey, boiled water, tin foil or cling film, cinnamon, mixed spice, yeast, bottles to put your mead in when it's finished.
 
 
1. Squeeze out a good helping of honey, covering the bottom of a good sized pan.
 
 
Here's how much honey I used - that was a full 375g bottle!
 
 
2. Fill up the pan with your boiled water and give it a good stir so the honey isn't all caught up at the bottom of the pan.
 
 
3. Heat and stir frequently. It needs to be heated for about 5 minutes in total.
 
 
4. Get your easy bake yeast ready alongside your spices.
 
 
5. Add a good sprinkle of cinnamon and all spice and stir well.
 
 
6. Add in a packet of yeast and stir well.


7. Cover with foil/cling film and place in a cool dark place for 7 days, allowing it to brew.
 
 
I gave mine a quick check after the 7 days were up. You don't have to!
 
 
8. Place in the fridge for a further 3 days and allow the sediment to settle at the bottom.
 
 
9. Remove from the fridge.
 
 
10. Strain out the liquid through a sieve into a pouring jug.
 
 
11. Pour into your empty bottle. (NB Make sure it is cleaned well in hot soapy water)
 
 
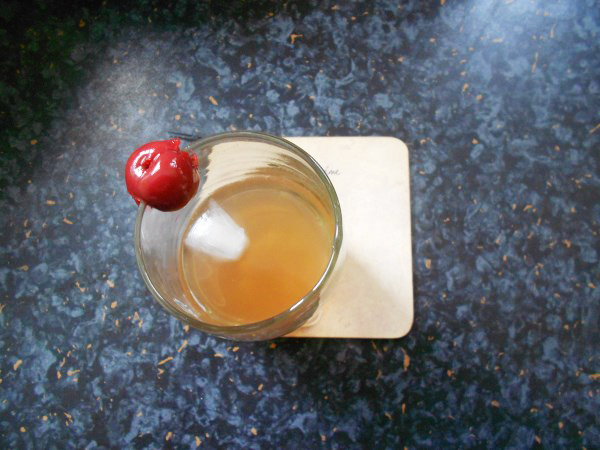
We poured out a little sample at this point, just to see what it was like. It was a sweet drink, which tasted a lot like those posh elderflower cordials you sometimes buy at county fairs and markets. Yum! My husband loved it!


12. Next, I labeled the bottles (you can do this beforehand if you'd like). I cut the labels to size after I printed them.
 
 
13. Then used a good coat of mod podge to seal them onto the glass.
 
 
I made labels for the back and the front of my bottles. If you'd like to use my labels, you can download them to print here.


14. Smooth out your labels.
 
 
15. Leave the glue to dry.
 
 
Ta-da! Your mead is packaged and ready. We did have a taste immediately, but we then bottled up our mead and have put it away for the recommended fermenting time (anywhere between 3 and 7 months). We're wondering if it will be more potent by then?!
 
Sarah Leonard is a curious soul, who lives a magical creative life with her kitties and her husband. She runs an Etsy store full to the brim with artistic curiosities, and writes regularly on her blog A Cat-Like Curiosity. She is also the founder of The Curiously Gorgeous Sisterhood, a gorgeous community full of light, life and inspiration.

Pin It