HomeMixed Media ArtCrafts ProjectsTips, Tricks, TutorialsScrapbooking & Project LifeCooking, Baking, RecipesHome & DIY


Monday, March 3, 2014

The Big 20/20 Event: Day 3: A Heartfelt Love Card Tutorial

Welcome back to “The Big 20/20 Event” - I am so glad you’re joining us! We will be sharing 20 fantastic tutorials from a host of awesome contributors, for 20 days.
If you enjoy the tutorials, make sure you sign up for my newsletter, as all my newsletter subscribers will receive a beautiful PDF eBook at the end of the event, showcasing all 20 tutorial projects to keep and peruse at their leisure!
Here we go with our Day 4 tutorial.
~*~*~*~*~*~*~*~*~*~*~*~*~*~*~

The Big 20/20 Event: Day 3: A Heartfelt Love Card Tutorial


This post is brought to you by the lovely Linda.
Supplies and materials:
Paper card and envelope (I use the ready made card and then add paper, stamps and other items)
Stamps
Colored Paper
Markers, Crayons, Pencils (to color in the stamps) 

Letters to spell the word LOVE - I might use these to make glass tile necklaces, they're printed on photo paper.


Adhesive to glue the paper and other items down onto the card. You can use tape, glue, zots or any other product you prefer.

Step 1 - Layout your items as a sample.
I know I want to use the letters, so I cut them out first using a paper cutter with a straight edge.
Step 2 - I know I want to use red for Valentine's Day, so I cut a piece of red paper as a background for the letter and cut out a heart.

Step 3 - Place your content on the (white) card to see how it look. The red background is too big for the card. 
Step 4 - Still playing with the layout, I placed a stamp in the lower right corner to see how it would look. (We have 4 cats, so you can say we're cat lovers. John spoils them more than I do.)
Step 6 - Layout - I was going to use the heart stamp, but decided it's too flowery for my husband, so it doesn't get used.
Step 7 - I glued the letters to the red background and cut it to fit the letters.
Step 8 - The letters are glued on the red background onto the card. The red heart is also glued to the card. Now I want to add the cat stamp and ink it with purple.


Step 9 - I decide to add a stamp to the inside too. The second images shows what it looks like.

The card is finished, but I don't seem to have a picture of the completed front, but you get the idea.
Step 10 - Clean up - clean the stamps with a stamp scrubber. I use water and a little hand soap to wash off the stamps. 


Voila! - A handmade Valentine's Day card - Cover (almost complete)
Inside bottom - where the signature goes.


~*~*~*~*~*~*~*~*~*~*~*~*~*~*~


A Little More About Linda:
My Inspiration: I am inspired to create women's handmade kippot (headcoverings) and Judaica jewelry because it's fun to celebrate holidays and special events (like bar/bat mitzvahs).  I believe every girl or woman should have a handmade memento of the occasion so that every time it's worn, she'll remember the event again.
Gemstone shapes and colors also inspire me to make combinations that are unique. I also consider the gemstone characteristics to help people attain positive attributes. And, who doesn't love the sparkle and light of Swarovski crystals?
My Creating Style: Mostly, I am a self-taught jewelry designer and I started creating jewelry in 2008. I joined Etsy, but didn't list anything for a few months. I began with pretty simple jewelry and then decided to focus more on a Jewish niche. After taking a few classes in wire wrapping, I really fell in love with wire and beads.
My Biggest dream: I'd like my jewelry and kippah designs to be a household name, that people love LinorStore Jewelry and Kippot by Linda B and can purchase items in retail shops and on my website. I see happening after I retire.


You can find the lovely Linda in the following places:
My About Page on my Website
Sign up for my newsletter and get a free jewelry cleaning report

Pin It

Sunday, March 2, 2014

The Big 20/20 Event: Day 2: How To Plan A Non-Fiction Book

Welcome back to “The Big 20/20 Event” - I am so glad you’re joining us! We will be sharing 20 fantastic tutorials from a host of awesome contributors, for 20 days.
If you enjoy the tutorials, make sure you sign up for my newsletter, as all my newsletter subscribers will receive a beautiful PDF eBook at the end of the event, showcasing all 20 tutorial projects to keep and peruse at their leisure!!
~*~*~*~*~*~*~*~*~*~*~*~*~*~*~
 

The Big 20/20 Event: Day 2: How To Plan A Non-Fiction Book

 
Write your own non-fiction book
 
This tutorial is brought to you by the lovely Llinos.
A non fiction book can be a fabulous way of marketing your business or blog, and I'm here to remove the fear factor from it.  Last year I planned and wrote my first book, a true story of my time as a cancer patient, which is being released in 2014. 
A book of this type has infinite possibilities for you.  You can use it as a giveaway on your website, to gain bookings as a speaker, or of course to build your profile as a writer.
So here's my guide to getting your book all planned out and ready to write...
1. First of all, you need to decide on a topic.  Are you going to write about an experience from your own life?  Or is the book going to be about the story of your business success? (See the above picture for my ideas!)

fears
 
2. Once you have decided, you probably have concerns about getting the project done.  Don't worry, it's completely natural.  Write down a list of your worries.  Then scribble them out and write the complete opposite.  Don't let fear hold you back!

affirmations
 
3. Get a pad of post its and write an affirmation on each piece of paper, in order to inspire you to complete the book.  Write about how you want to feel as you write the book, and how you will be elated when you complete the project.

brainstorm
 
4. On a sheet of A4 paper, design a mind map of the book's outline.  Don't overthink it, go with what feels natural for every chapter.  Having a bubble for every chapter would be a good start.  Enjoy using different pens and colours!

your map
 
5. When you're happy with your chapter headings and can stick the map on the wall where you can see it, you can mind map each chapter with the important points to include in every one.  Remember you don't have to find all content from scratch; you can use your blog posts, or journal entries.  Look through your work or browse photos for inspiration and guidance on what to include in the book. 
You now have a clear map of your book.  Get to it and write!

And here's a little more about the lovely Llinos:
What inspires you?
I get lots of inspiration from nature, books and animals.  I'm lucky to have a vivid imagination and a  deep love of life.
Where do you get ideas?
I browse blogs and Etsy.  I doodle and see where the journey takes me.  I always have a stock of pretty paper or paints to get ideas flowing.
How long have you been creating products?
I first got in touch with my creative nature and began making candles about 5 years ago.  Then I drifted away from it, and in 2012 developed a love of making art and cards.  All my life I have written stories and articles. 
What is your biggest dream for the future?
My big, beautiful dream is to set up my own successful Etsy shop and inspire women with my card designs and affirmations.  I also want to raise oodles of money for charity and write lots of books, fiction and non fiction, and release them into the world for the women who need them most.

Llinos
 
 
Llinos is a writer, speaker, fundraiser and creative soul who lives in Cardiff, UK.  Find her at Inspiration After Illness or on Twitter @afterillness

Pin It

Saturday, March 1, 2014

The Big 20/20 Event: Day 1: Make Your Own Honeyed Mead

Today we’re kicking off “The Big 20/20 Event! I’m so happy you are joining us!
Over the next 20 days, we will be sharing 20 fantastic tutorials from a host of awesome contributors.
If you enjoy the tutorials, make sure you sign up for my newsletter, as all my newsletter subscribers will receive a beautiful PDF eBook at the end of the event, showcasing all 20 tutorial projects to keep and peruse at their leisure!!
~*~*~*~*~*~*~*~*~*~*~*~*~*~*~
But now, without further ado, our first contribution to the event:
 

Make Your Own Honeyed Mead


Hello there lovelies! I hope you are well, wherever in the world you are joining us from and WELCOME TO OUR BIG 20/20 EVENT!
I am so looking forward to sharing with you a whole series of 20 tutorials from a whole team of talented creatives, including myself.
As the organizer of the event, I thought it only fair that I kick things off with my own tutorial. It is a recipe I based on one in the above spell book and was something that was completely new to me.
 
Let's make some Honeyed Mead together. The perfect drink to accompany Game Of Thrones :)
Here's the how-to:
 
 
You will need: honey, boiled water, tin foil or cling film, cinnamon, mixed spice, yeast, bottles to put your mead in when it's finished.
 
 
1. Squeeze out a good helping of honey, covering the bottom of a good sized pan.
 
 
Here's how much honey I used - that was a full 375g bottle!
 
 
2. Fill up the pan with your boiled water and give it a good stir so the honey isn't all caught up at the bottom of the pan.
 
 
3. Heat and stir frequently. It needs to be heated for about 5 minutes in total.
 
 
4. Get your easy bake yeast ready alongside your spices.
 
 
5. Add a good sprinkle of cinnamon and all spice and stir well.
 
 
6. Add in a packet of yeast and stir well.


7. Cover with foil/cling film and place in a cool dark place for 7 days, allowing it to brew.
 
 
I gave mine a quick check after the 7 days were up. You don't have to!
 
 
8. Place in the fridge for a further 3 days and allow the sediment to settle at the bottom.
 
 
9. Remove from the fridge.
 
 
10. Strain out the liquid through a sieve into a pouring jug.
 
 
11. Pour into your empty bottle. (NB Make sure it is cleaned well in hot soapy water)
 
 
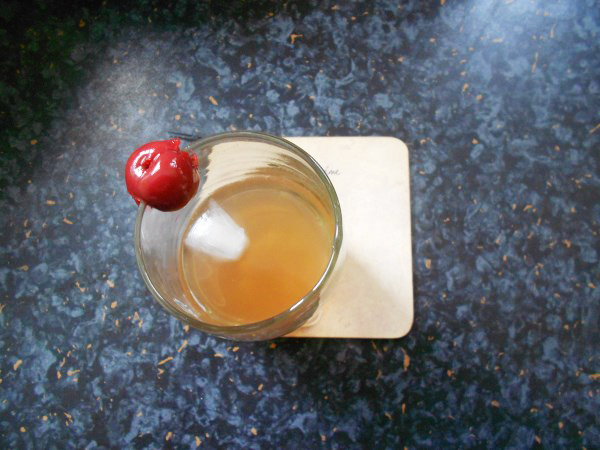
We poured out a little sample at this point, just to see what it was like. It was a sweet drink, which tasted a lot like those posh elderflower cordials you sometimes buy at county fairs and markets. Yum! My husband loved it!


12. Next, I labeled the bottles (you can do this beforehand if you'd like). I cut the labels to size after I printed them.
 
 
13. Then used a good coat of mod podge to seal them onto the glass.
 
 
I made labels for the back and the front of my bottles. If you'd like to use my labels, you can download them to print here.


14. Smooth out your labels.
 
 
15. Leave the glue to dry.
 
 
Ta-da! Your mead is packaged and ready. We did have a taste immediately, but we then bottled up our mead and have put it away for the recommended fermenting time (anywhere between 3 and 7 months). We're wondering if it will be more potent by then?!
 
Sarah Leonard is a curious soul, who lives a magical creative life with her kitties and her husband. She runs an Etsy store full to the brim with artistic curiosities, and writes regularly on her blog A Cat-Like Curiosity. She is also the founder of The Curiously Gorgeous Sisterhood, a gorgeous community full of light, life and inspiration.

Pin It

Tuesday, February 25, 2014

Happening Around Here Lately

1.) Storing paint.

The other day I had one of those forehead-smacking, why-didn’t-I-think-of-that kind of moments when I read somebody’s tip to storing acrylic paint!
Up until then, I would paint a little dot of the color in the bottle on top of the lid, so I could easily find my colors. The problem is, that it required me to open all the bottles, had to wait for the dot to dry before I could store them and quite often, depending on what light I had in the studio, the dots wouldn’t show the subtle color differences clearly enough!


Well, turns out there’s a much easier way!
Store them upside down!! No-brainer, right?


Not only does it make color recognition much easier, it also helps with easily dispensing the paint in the bottles that are less than all the way full. And, it also stops the paint from drying out if the cap happens to be on less than perfectly closed.

2.) A quote for today. This has been so true for me lately. Well, it’s true all the time, let’s say it has been more relevant lately!

“Sometimes your only available transportation is a leap of faith!”

-Margaret Shepard


3.) Inexpensive Light Box.
I used to have a lovely light box for tracing, embossing and pretty much anything I needed to have illuminated from behind. The last time I pulled it out of the cupboard to use, I saw that the D batteries had dumped all their not so lovely content all inside the light box and essentially irreparably ruined it.
When I went to look for a replacement, I remembered just HOW expensive these thing were. And honestly, I don’t really need anything terribly sophisticated - I just need something that doesn’t take up too much space and shines a reasonably bright light through various thicknesses of paper!
I came across this Crayola Light Up Tracing Pad and I thought I’d give it a try. It was less than half of what others cost, and with two young kids in the house, even if it didn’t work for me, it would get used plenty!
Well, let me tell you! I LOVE this thing!
It’s thin, it’s light, it stores away easily, it gives me what I need light-wise and I’ve used it a LOT for quite a few weeks now and I still love it!
What do I use it for? I find I use it for many things, but one of my main uses for a while was sketch transfer.
Well, when I first started doing faces, I realized that I was really holding back because I didn’t want to “ruin” the expensive paper with too much erasing. Yet, I found that if I sketched on cheap paper, I was more willing to experiment and go with the flow. If it didn’t work out, nothing much was lost!
And as a beginner sketcher, you HAVE to practice and have to be willing to make mistakes and “loosen” your wrist and all that. And every once in a while, even while just playing around, you’d manage to create something you actually liked and then how do you get it to your good paper?
So, once I had it sketched onto the cheap paper and to my satisfaction, I would then use the light box to trace it onto my hot-press watercolor paper. Double the work? Yes. But it’s worth it to me!
And as I grew/grow more confident, the less I need to do the double sketching.

4.) The big 20/20 event is starting on March 1st! I you haven’t heard yet, I have gotten together with some really talented ladies and we put together 'The Big 20/20 Event'.


The event itself is all about creativity, ideas, instructions and all things inspirational. we have got a whole host of gorgeous contributors on our team, and they have some fantastic tutorials to share with you.
Here is a sneak peak of what I will be giving one of my tutorials on.  Yep, I’m doing two!


5.) Yum!
These are grain-free/paleo Spaetzle! So easy to make, so yummy!


I slightly modified this recipe for Paleo Pasta and prepared it in the traditional “Spaetzle way” with the most delicious result. And much less work than pasta!

Pin It

Friday, February 21, 2014

Transition

The other day, I sat down to do one of the Lifebook 2014 lessons and within the first few minutes of laying down my colors, it went a completely different way!
Now, in days gone by, I would have made myself got back to the lesson and do it “properly,” but these days I go with the flow much more. I do follow the whispers a whole lot more!

So, I also did this time.

And this is what emerged!


{Transition}

Art Print available in my Etsy Store.


I am starting to LOVE going with the flow in my art! Somehow it always just depicts where I’m at, even when I wouldn’t be able to express it in any other way!

The piece above is done with acrylic ink and colored graphite pencils.


I feel like a lot is transitioning for me right now in all levels of my life. Nothing major really to the outside world, I’m sure. More quiet little changes, large and small shifts within, letting go,  transitioning into new ways of thinking, feeling, doing and perceiving.


YES!


What the caterpillar calls the end of the world, the master calls a butterfly.

Richard Bach

And YES to butterflies!

Pin It

Monday, February 17, 2014

The Evolution Of An Intuitive Painting

For week 8 in our Lifebook 2014 class, we had a lesson from the lovely Alena Hennessy.

She led us in a short meditation, then had us write a letter to self/universe/god/angels, all before we started with our painting. There were really no rules or definitive instruction on the painting per se, other than paint and do what you want to do, do what feels  right, express what you feel guided to, paint as freely as a child!


I loved it! I often meditate before doing my art these days and I am getting more and more into the intuitive painting kind of style, so this was just right for me! Thankfully it was also a holiday today, so I got a little time to play! It was great, and quite surprising, what wanted to come out of me today!


And I actually remembered to capture a few stages along the way, so I can show you just how one of those intuitive paintings can evolve!


This is what I started with. Lots of color! Sprays, drips, splats, scribbles, a stencils. I just went for it!


Then I toned it down a bit with some white acrylic paint. Some brushed on, some brayered on, some smeared with my fingers. It all was very random!

Then I drew some acrylic ink scribble flowers with the little dropper, right out of the bottle. I also took an old gift card and ran it through some acrylic ink, which I then scraped onto the painting. You can see them as the vertical lines in the painting.

After that I had to sit with it for a bit. I somewhat had a notion of where I wanted it to go, but I couldn’t quite “grab” it. In the end I took a pen and just started to doodle.


First the large circle on top, then moving on to the middle one and finally I doodled the last circle into the flower petals that were shining through from the previous layers.


Next, some more dotting and decorating around the circles. Some really free-motion, “let the hand do what it wants and then see what you’ll do with it” kind of stuff! It is SO freeing!


Then I needed some shimmer! It’s hard to capture it, as always. You can see it a little better in the photo rather than the scan. From this angle you can see the rather more intensly yellow-ochre patches. Those are the perfect pearl shimmers.  Not that they look that yellow when you look straight at the painting. You just get a little shimmer!


We were encouraged to put a mantra or some positively inspiring words on our painting. I kept on trying to think of something short and sweet, but in the end, what it always came back to, was this excerpt from Theodore Roosevelt’s speech, that has had me so inspired and fascinated for quite some time now.
It was about time that I did a page featuring it!


It reads:

It is not the critic who counts; not the man who points out how the strong man stumbles, or where the doer of deeds could have done them better. The credit belongs to the man who is actually in the arena, whose face is marred by dust and sweat and blood; who strives valiantly; who errs, who comes short again and again, because there is no effort without error and shortcoming; but who does actually strive to do the deeds; who knows great enthusiasms, the great devotions; who spends himself in a worthy cause; who at the best knows in the end the triumph of high achievement, and who at the worst, if he fails, at least fails while daring greatly.”

YES! Yes, to daring greatly!

Pin It